7.1. Creating a Workflow
Creating a Workflow is very similar to creating a Pipeline with a few additional steps.
Create or load a Pipeline. Review Creating Pipelines and Import Export Pipelines sections of this documentation for further information.
Add your Workflow Parameters.
To make a parameter a Workflow Parameter, start by opening the Filter Parameters tab and clicking through the filters in the Pipeline view to find the parameter.
Locate the add to workflow button (
 ) next to
it along the right most edge of the Filter Parameters tab.
) next to
it along the right most edge of the Filter Parameters tab.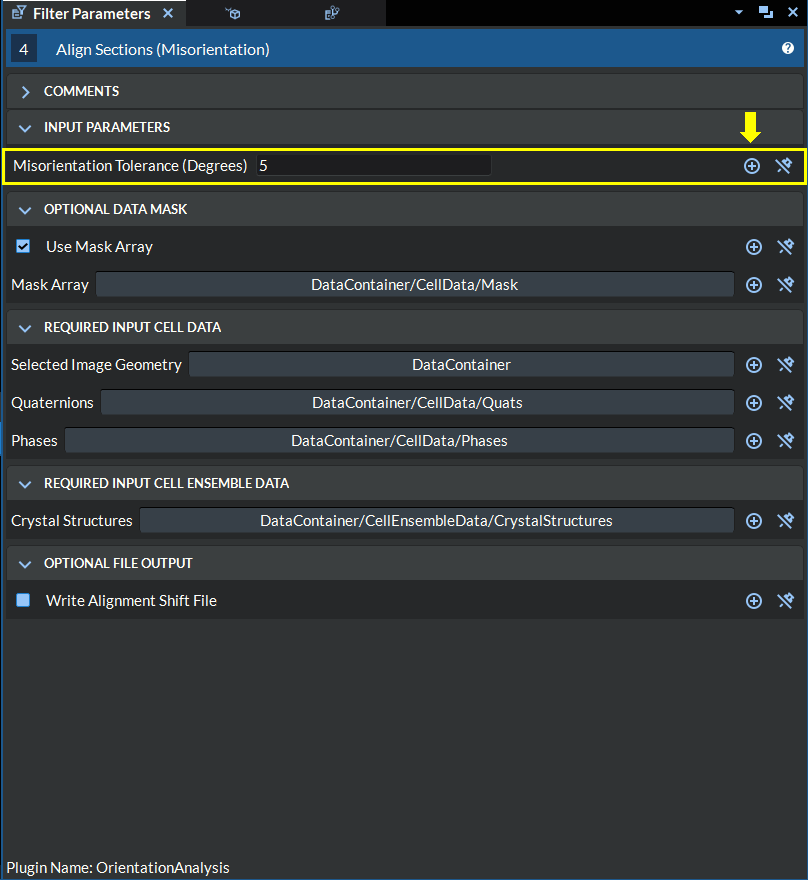
Figure 7.1 Filter Parameter with Workflow buttons
Click the add to workflow button once to add it to the Workflow Parameters. When the parameter has been successfully added to the Workflow Parameters, the button should change from a + to a - (
 ). To remove the parameter
from the Workflow Parameters, simply press this button again
until it changes back ( ).
). To remove the parameter
from the Workflow Parameters, simply press this button again
until it changes back ( ).Repeat the above 3 steps for each parameter you would like to add to the Workflow Parameters.
Check your Workflow Parameters. You can preview the selected Workflow Parameters all together from the Workflow Parameters tab before saving your Workflow file.
Make sure the Workflow Parameters tab is enabled by going to the View tab (item 1 in the image below) on the Menu Bar at the top of the DREAM3D-NX window. In the View menu, make sure there is a check mark next to the Workflow Parameters item (item 2 in the image below). When checked this should make the Workflow Parameters tab visible in the center of your window (item 3 in the image below).
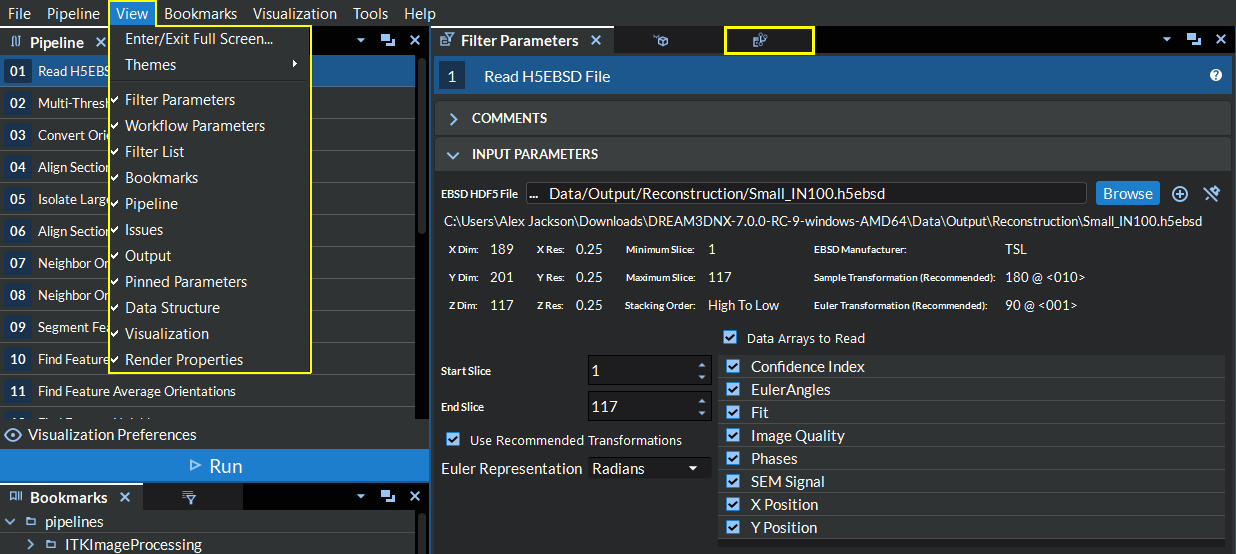
Figure 7.2 Workflow Parameters View Menu
With the Workflow Parameters tab view enabled, Click on the tab to view all of your Workflow Parameters. In this view, you will see each parameter listed out with a colored square containing a number referencing the filter number, in relation to the position in pipeline, from which that parameter came (see the items in column 1 in the image below). From this view you can edit the parameters’ default values as well as remove them from the list of Workflow Parameters via the buttons in column 2 in the image below.
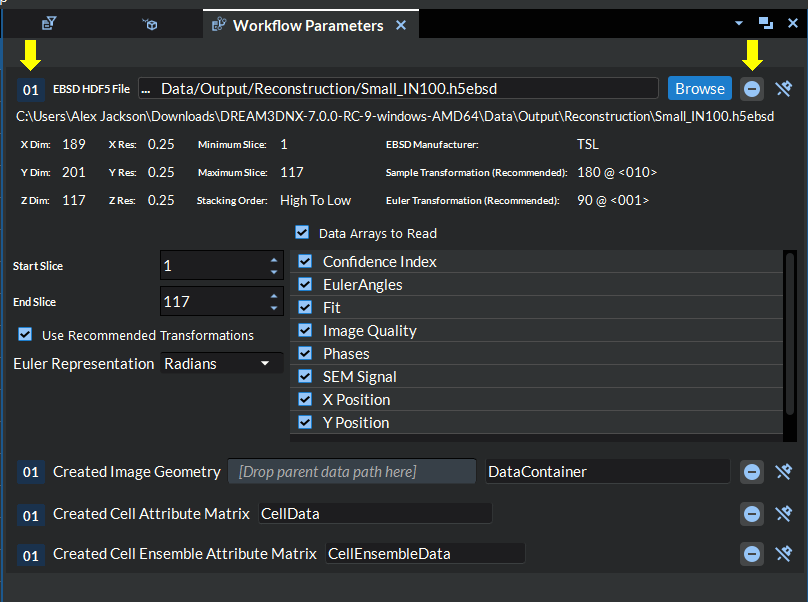
Figure 7.3 Workflow Parameters Tab
Save your workflow file.
Go to the File tab in the Menu Bar at the top of your window and select the Save As option.
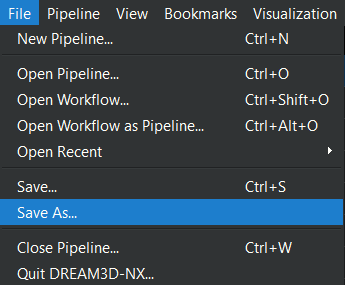
Figure 7.4 File Menu Save As
This will open a file browser. Navigate to the location you would like to save the file to and enter the file name. Before clicking Save, make sure to click on the Save As Type drop down menu and switch it to the Workflow File (*.d3dworkflow) option.
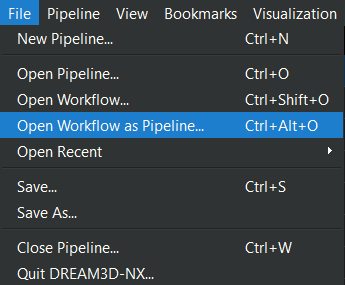
Figure 7.5 Open Workflow as Pipeline Option
After choosing the file path in which to save the workflow, a dialog will popup asking if you would like to save a visualization preset with the workflow. If you choose yes, a second dialog will popup showing the list of available presets. Select a preset from this list and click Apply to add that preset to the workflow. To cancel adding a preset and continue with saving the rest of the workflow, click Cancel. Adding a preset to a workflow allows DREAM3D-NX to automatically apply a pre determined set of visualization filters and data views to the resulting data sources from the workflow execution for viewing in the visualization tab.
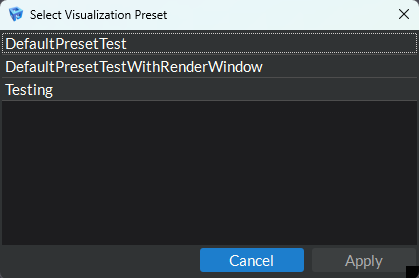
Figure 7.6 Workflow Visualization Preset Selection
Workflow is now available for loading and running. If at any time the need to edit the Workflow Parameters for a particular Workflow arises, simply go to the File tab in the Menu Bar and clicking the Open Workflow as Pipeline option. This will open the Workflow in the normal pipeline mode which will allow you to add and remove Workflow parameters as well as edit the hidden parameter values as needed.