Tutorial 1: Basic Python Integration
This tutorial is meant to be a very basic introduction to interacting with the DREAM3D-NX underlying library called ‘simplnx’. This tutorial will cover the following topics:
Environment setup
Minimal import statements
Executing a few basic filters
Accessing your data through a Numpy View
Once you understand how to execute a filter, all filters are generally setup the same way. Use the search feature on the web site to find the filter that you are interested in running.
1.1 Anaconda Virtual Environment Setup
conda config --add channels conda-forge
conda config --set channel_priority strict
conda create -c bluequartzsoftware -n nxpython python=3.12 dream3dnx matplotlib
conda activate nxpython
1.2 Introduction
Setup your virtual environment following the directions from above. Then create a Tutorial_1.py file anywhere that you want and open that up in your Editor/IDE.
1.3 Necessary Import Statements
Just about every python source code that is written will need the following import Statements:
import simplnx as nx
import numpy as np
If you will be using filters from DREAM3D-NX’s other plugins, then you may additionally need the following:
import itkimageprocessing as nxitk
import orientationanalysis as nxor
Also use these import statements:
from pathlib import Path
import matplotlib.pyplot as plt
1.4 Set Output Directory
Set the output directory where the output from this tutorial will be stored, and create the directory. We are going to set the output directory in the same location as the current script.
output_dir = Path(__file__).parent / 'Output' / 'Tutorial_1_Output'
output_dir.mkdir(exist_ok=True, parents=True)
1.5 Creating the DataStructure Object
If you will be interacting with data stored in DREAM3D-NX, you will need to instantiate a DataStructure object. This is simply done with the following line of code:
# Create the DataStructure Object
data_structure = nx.DataStructure()
A few caveats to take note of: 1. You can have as many DataStructure objects as you want/need. Typically all data is stored in a single DataStructure object but there are use cases where having more than a single DataStructure object is needed. 2. Only a single DataStructure object can be stored in a .dream3d file.
1.6 First Steps: Create a Group in the DataStructure
As in the user interface of DREAM3D-NX, you as the developer can execute any of the filters from DREAM3D-NX using only Python codes. This is performed by instantiating the filter and then calling the execute() method with the appropriate parameters used in the call. With the current API, we are tending to inline instantiate the filter and execute it all in the same line. Some things to note with this small piece of code:
There will always be a required DataStructure object. All arguments in the execute() method are named arguments. None are positional. This means that each argument must be in the form of ‘name=value’.
The 2nd argument shows a use of the DataPath object. Lots of filters will require a DataPath object so this is a common use.
There is a method called hierarchy_to_str() that is a part of the DataStructure class which will print the heirarchy of the DataStructure.
result = nx.CreateDataGroupFilter.execute(data_structure=data_structure,
                                data_object_path=nx.DataPath("Top Level Group"))
print(f'{data_structure.hierarchy_to_str()}')
If we were to run this code we would get the following:
|--Top Level Group
1.6.1 Adding Multiple Groups (Optional)
Let’s try to add a bunch of groups to the DataStructure object by using a loop:
for i in range(1, 6):

    current_data_group_path = nx.DataPath(f"Top Level Group {i}")
    result = nx.CreateDataGroupFilter.execute(data_structure=data_structure,
                                        data_object_path=current_data_group_path)
print(f'{data_structure.hierarchy_to_str()}')
And the output would look like the following:
|--Top Level Group 1
|--Top Level Group 2
|--Top Level Group 3
|--Top Level Group 4
|--Top Level Group 5
1.7 Result Objects
Each time a filter is executed, it will return a nx.IFilter.ExecuteResult object. This object can be interrogated for both warnings and errors that occured while the filter was executing. A typical function that can be written to properly error check the ‘result’ value is the following:
def check_filter_result(filter: nx.IFilter, result: nx.IFilter.ExecuteResult) -> None:
    """
    This function will check the `result` for any errors. If errors do exist then a
    `RuntimeError` will be thrown. Your own code to modify this to return something
    else that doesn't just stop your script in its tracks.
    """
    if len(result.warnings) != 0:
        for w in result.warnings:
            print(f'Warning: ({w.code}) {w.message}')

    has_errors = len(result.errors) != 0
    if has_errors:
        for err in result.errors:
            print(f'Error: ({err.code}) {err.message}')
            raise RuntimeError(result)
    else:
        print(f"{filter.name()} :: No errors running the filter")
If you were to integrate this into your own code, then we would get the following when we wanted to execute a filter:
result = nx.CreateDataGroupFilter.execute(data_structure=data_structure,
                                data_object_path=nx.DataPath("Top Level Group"))
check_filter_result( nx.CreateDataGroupFilter(), result)
1.8 Creating a DataArray Object
Raw data is stored in a DataArray object within the DataStructure. The DREAM3D-NX python bindings only expose a subset of functionality from the DataArray, enough to get the name, tuple shape and component shape. ALL interactions to modify a DataArray are done via a numpy view. Let us first create a DataArray object within the DataStructure by using the CreateDataArrayFilter filter. Adding into the current python source file…
result = nx.CreateDataArrayFilter().execute(data_structure=data_structure,
                                        component_count=1,
                                        initialization_value_str="0",
                                        numeric_type_index=nx.NumericType.float32,
                                        output_array_path=nx.DataPath("Top Level Group/2D Array"),
                                        tuple_dimensions=[[5,4]])
check_filter_result( nx.CreateDataArrayFilter(), result)
print(f'{data_structure.hierarchy_to_str()}')
Note how we are creating the array inside the very first DataGroup that we created. If we run the file from start to finish we now get the following output:
|--Top Level Group
  |--2D Array
|--Top Level Group 1
|--Top Level Group 2
|--Top Level Group 3
|--Top Level Group 4
|--Top Level Group 5
As you can see we have successfully created an array that can hold some data. The next step is to interact with that DataArray and use numpy to modify the array in place.
1.9 Modifying the DataArray Object using Numpy
The method from DataStructure that we will be using is item selection using the ‘[]’ operator paired with an immediate call to the ‘.npview()’ method. This will retrieve the a numpy view of the DataArray that was created in the last step.
array_view = data_structure["Top Level Group/2D Array"].npview()
Now that we have a numpy view we can do anything to the array that numpy (or any other package that accepts numpy views) can do for us. For example, we can create random data in the array using the following:
# Fill the numpy data view with random numbers
rng = np.random.default_rng()
rng.standard_normal(out=array_view, dtype=np.float32)
print(f'{array_view}')
The output from this code would print something similar to:
[[[-1.3746183 ]
[-0.08409024]
[ 1.2792562 ]
[-0.37265882]
[ 0.05201177]]

[[-0.11597582]
[-0.35329401]
[-0.88307136]
[-0.98040694]
[ 0.28385338]]

[[ 0.7635286 ]
[-1.3911186 ]
[ 0.5670461 ]
[ 0.11915083]
[-0.8656706 ]]

[[ 2.1133974 ]
[ 1.3168721 ]
[ 2.6951575 ]
[ 0.10712756]
[-0.07898012]]]
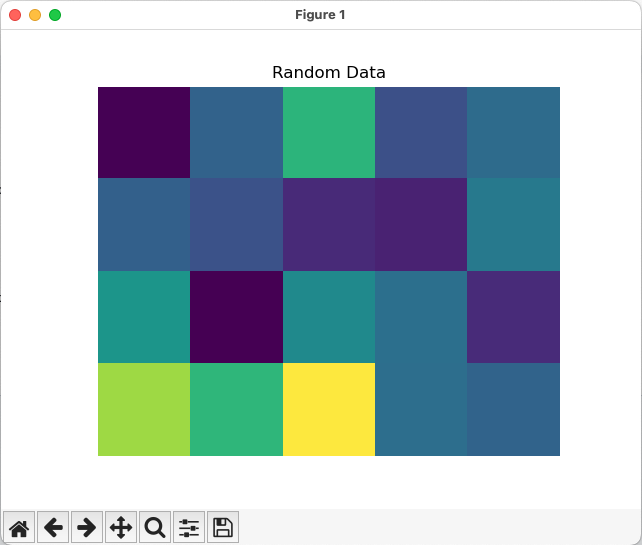
And if you wanted to use matplotlib to view the data, that is easily done in the usual manner:
# Show the result
plt.imshow(array_view)
plt.title("Random Data")
plt.axis('off')  # to turn off axes
plt.show()
1.10 Saving your Data to a .dream3d file
Most pipelines would want to save any modified data to a .dream3d file (if you are wanting the easiest compatibility with DREAM3D-NX). In order to do this one would run the WriteDREAM3DFilter. Appending the following code will write the entire DataStructure to a .dream3d file (which is a plain HDF5 file).
# Use the WriteDREAM3DFilter to write out the modified DataStructure to disk
result = nx.WriteDREAM3DFilter.execute(data_structure=data_structure,
                                    export_file_path=str(output_dir / 'tutorial_1.dream3d'),
                                    write_xdmf_file=False)
check_filter_result( nx.WriteDREAM3DFilter(), result)
1.11 Full Example
Full example of this tutorial is located at:
https://github.com/BlueQuartzSoftware/NXWorkshop/blob/develop/PythonTutorial/tutorial_1.py