7.2. Importing Data into the Quad View
In this section we will go over how to get image geometry data into the Quad View module.
Note
The Quad View only supports ImageGeometry data. If your pipeline produces other geometry types (TriangleGeom, EdgeGeom, VertexGeom, etc.), those geometries will not appear in the Geometry Browser.
There are two ways to load data sources into the Quad View’s Geometry Browser:
loading from a running DREAM3D-NX pipeline
loading directly from a .dream3d file
Once a data source is loaded into the Geometry Browser, a specific geometry from that source must be dragged and dropped into one of the four view windows to display it.
Import Data From a Pipeline
The first way to load data into the Quad View is by running a pipeline. When a pipeline that contains image geometry data finishes executing, its geometries are automatically added to the Geometry Browser tree.
Load or create your pipeline. See the Creating a Pipeline section in User Interface Overview for more detailed instructions.
Open the Preferences dialog (click the eyeball icon at the bottom of the Pipeline View, or go to Tools ▸ Preferences), select the Results tab, and make sure Quad View is checked under Send pipeline results to:.
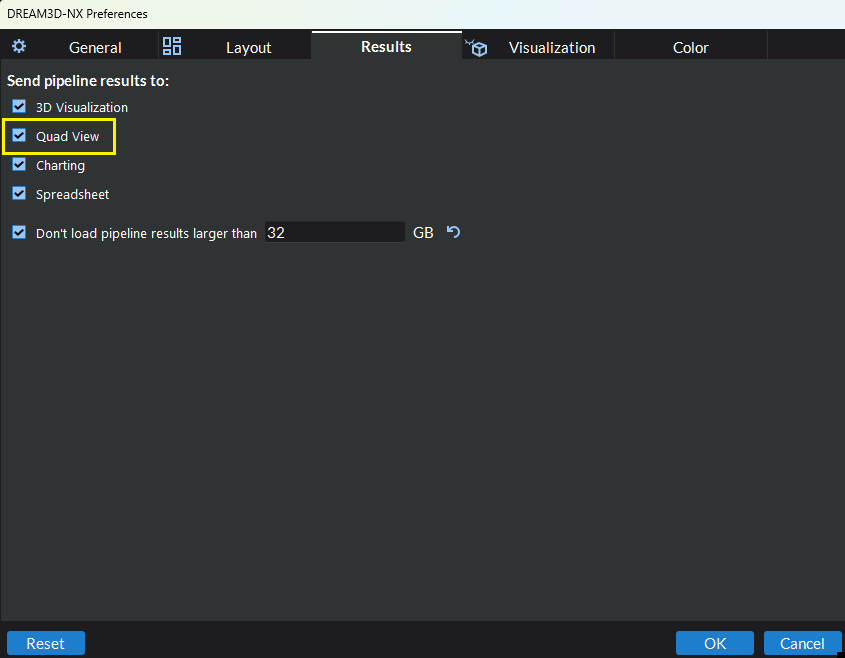
Figure 7.8 Enabling Quad View under “Send pipeline results to:” on the Results tab
While the preferences dialog is still open, go to the General tab and locate the Temp DREAM3D-NX Files Directory option. This setting controls how the Quad View imports the data structure:
If this option is enabled, the Quad View reads data on the fly from a temporary file written during the pipeline run.
If this option is disabled and no Write DREAM3D NX File filter is present in your pipeline, the entire data structure is kept in memory after the run. See Memory Usage Notes below for details.
Click the Run button at the bottom of the Pipeline view to execute the pipeline.
Select the Quad View tab if it is not already active.
Once the pipeline has finished, the pipeline entry will appear as a top-level node in the Geometry Browser tree with each of its image geometries listed as child nodes.
If the pipeline has already been loaded into the Geometry Browser and is executed again, the entry and all of its geometries will be automatically refreshed with the new results.
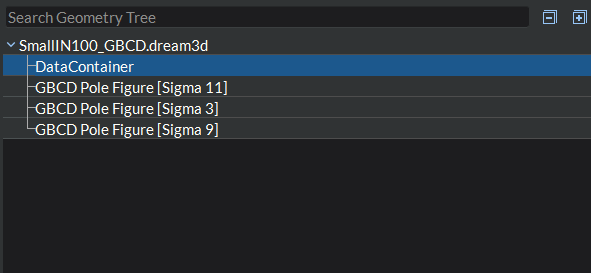
Figure 7.9 Geometry Browser Showing a Loaded Pipeline and Its Geometries
Note
If you modify and re-run a pipeline that is already loaded in the Geometry Browser, the Quad View will automatically refresh the entry with the new results.
Memory Usage Notes
The way the Quad View accesses data after a pipeline run depends on whether the Temp DREAM3D-NX Files Directory option is enabled and whether the pipeline includes a Write DREAM3D NX File filter:
Temp File |
Write DREAM3D-NX File Filter |
Notes |
|---|---|---|
YES |
NO |
Data is read on the fly from the temporary file. |
NO |
YES |
Data is read on the fly from the |
YES |
YES |
Data is read on the fly from the |
NO |
NO |
The entire data structure is kept in memory. Cannot be used with out-of-core data. |
Note
If you are working with out-of-core (very large) data you must have either the Temp DREAM3D-NX Files Directory option enabled or a Write DREAM3D NX File filter at the end of your pipeline.
Import Data From a File
The second way to load data into the Quad View is by opening a
.dream3d file directly. Only .dream3d files containing image
geometry data are supported.
There are two ways to open a file:
Via the Context Menu:
Make sure the Quad View tab is active.
Right-click anywhere in the Geometry Browser and select Load File… from the context menu that appears.
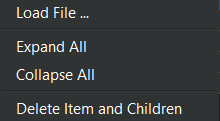
Figure 7.10 Context Menu Load File Option
In the file browser that opens, navigate to the
.dream3dfile you want to open and click Open. The file will appear as a top-level node in the Geometry Browser with its image geometries listed as children.
Via Drag and Drop:
In your system’s file browser, locate the
.dream3dfile you want to open.Drag the file and drop it anywhere onto the Quad View module area. The file’s image geometries will be added to the Geometry Browser tree.
Note
.d3dstate files (Quad View state files) can also be dropped onto
the module area. Dropping a state file restores the entire saved
layout — geometry browser contents, tabs, and per-tab control
settings. See Saving and Loading State
for details.
Loading a Geometry into the Views
Loading a data source into the Geometry Browser only makes its geometries available. To actually display a geometry in the four windows, you must drag it from the Geometry Browser into the view area.
In the Geometry Browser, expand the data source node to reveal its geometry children.
Click and drag a geometry leaf node from the browser.
Drop it onto any of the four windows in the view area.
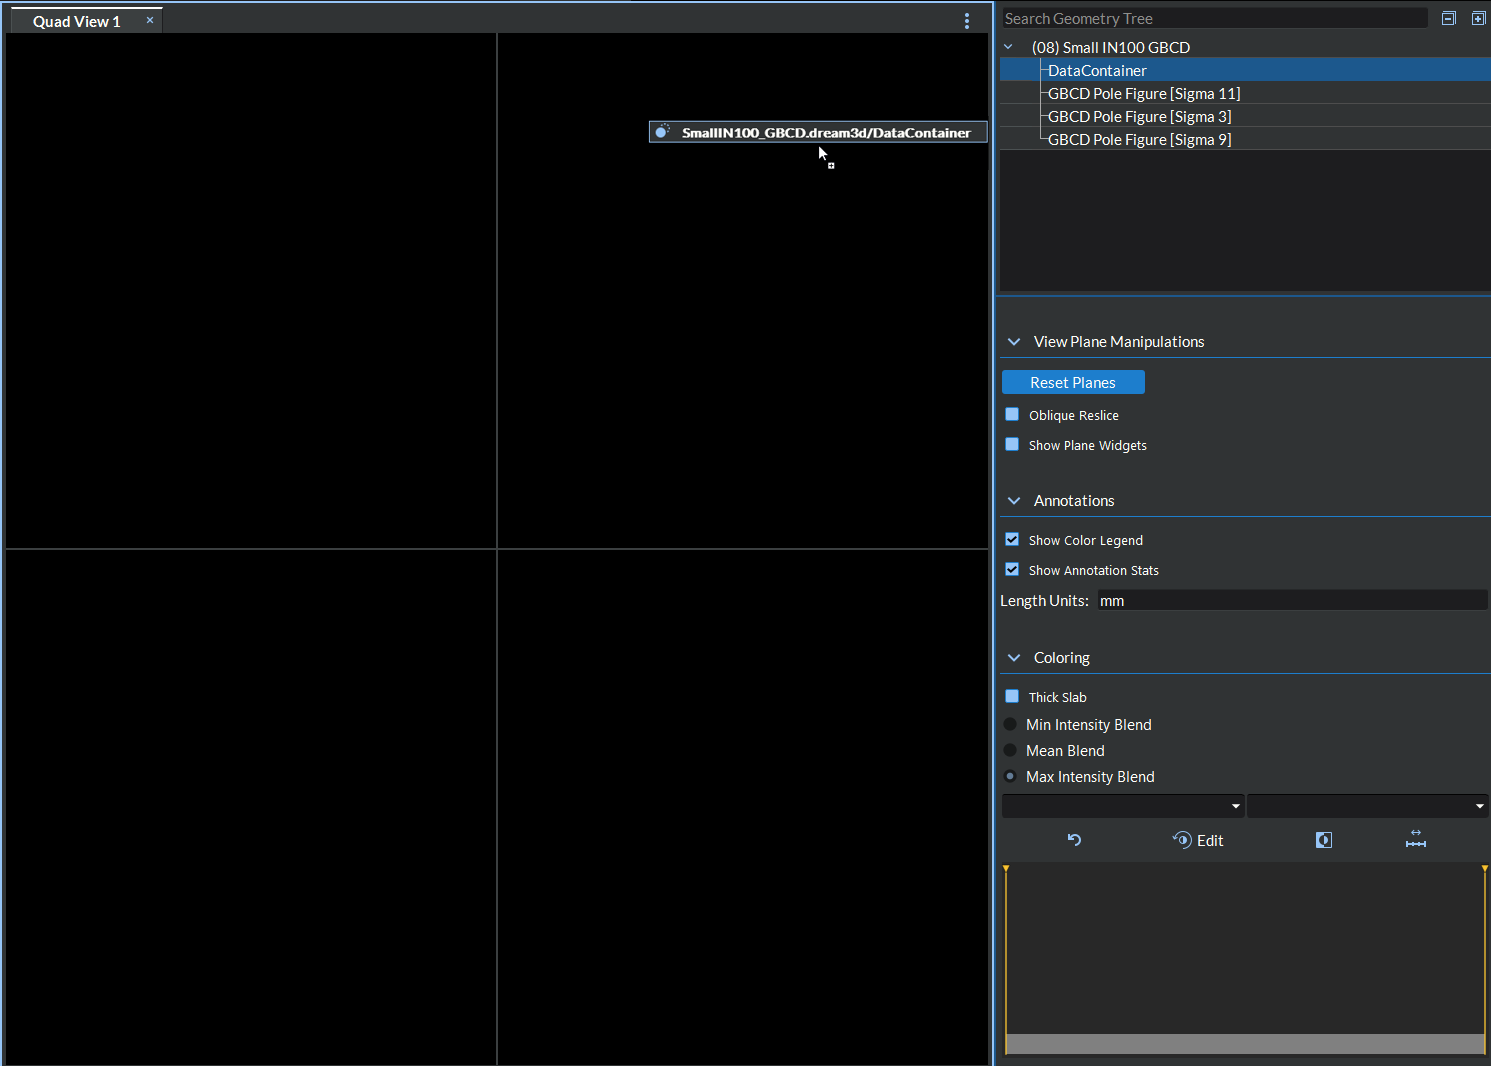
Figure 7.11 Dragging a Geometry from the Browser into the View Area
The geometry will load into all four windows simultaneously. The first available data array will be selected automatically and the views will render the data using the default color mapping.
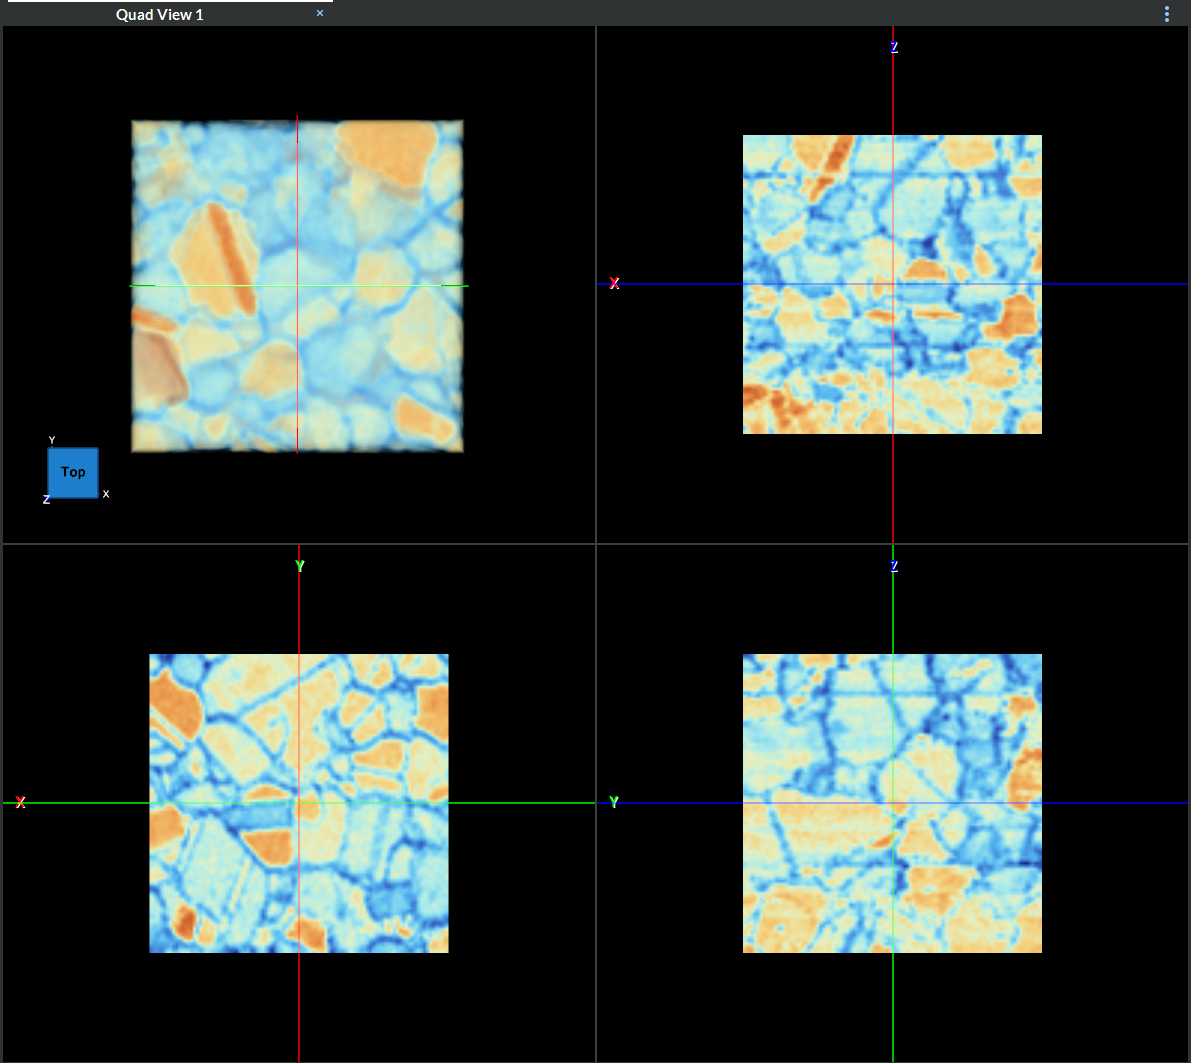
Figure 7.12 Quad View After a Geometry Has Been Loaded
Note
Each Quad View tab displays one geometry at a time. Dropping a new geometry onto a tab that already shows a geometry will replace it. To compare multiple geometries, use the Add Quad View workflow described in the next section to open additional tabs.
Displaying Multiple Geometries
The Quad View module is a tabbed container — a single pane that holds one or more Quad View tabs, each displaying its own geometry with its own independent control state. To compare or switch between datasets, add additional tabs and drop a different geometry into each one.
To add a new tab, right-click the tab strip at the top of the Quad View and choose Add Quad View → To This Window, or use the same entry from the corner menu button (the “more” icon at the right end of the tab strip). A new empty tab is appended next to the current one; drop any geometry from the Geometry Browser into it without affecting the geometry loaded in the existing tab.
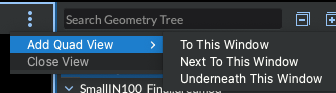
Figure 7.13 The Add Quad View submenu open on a tab strip.
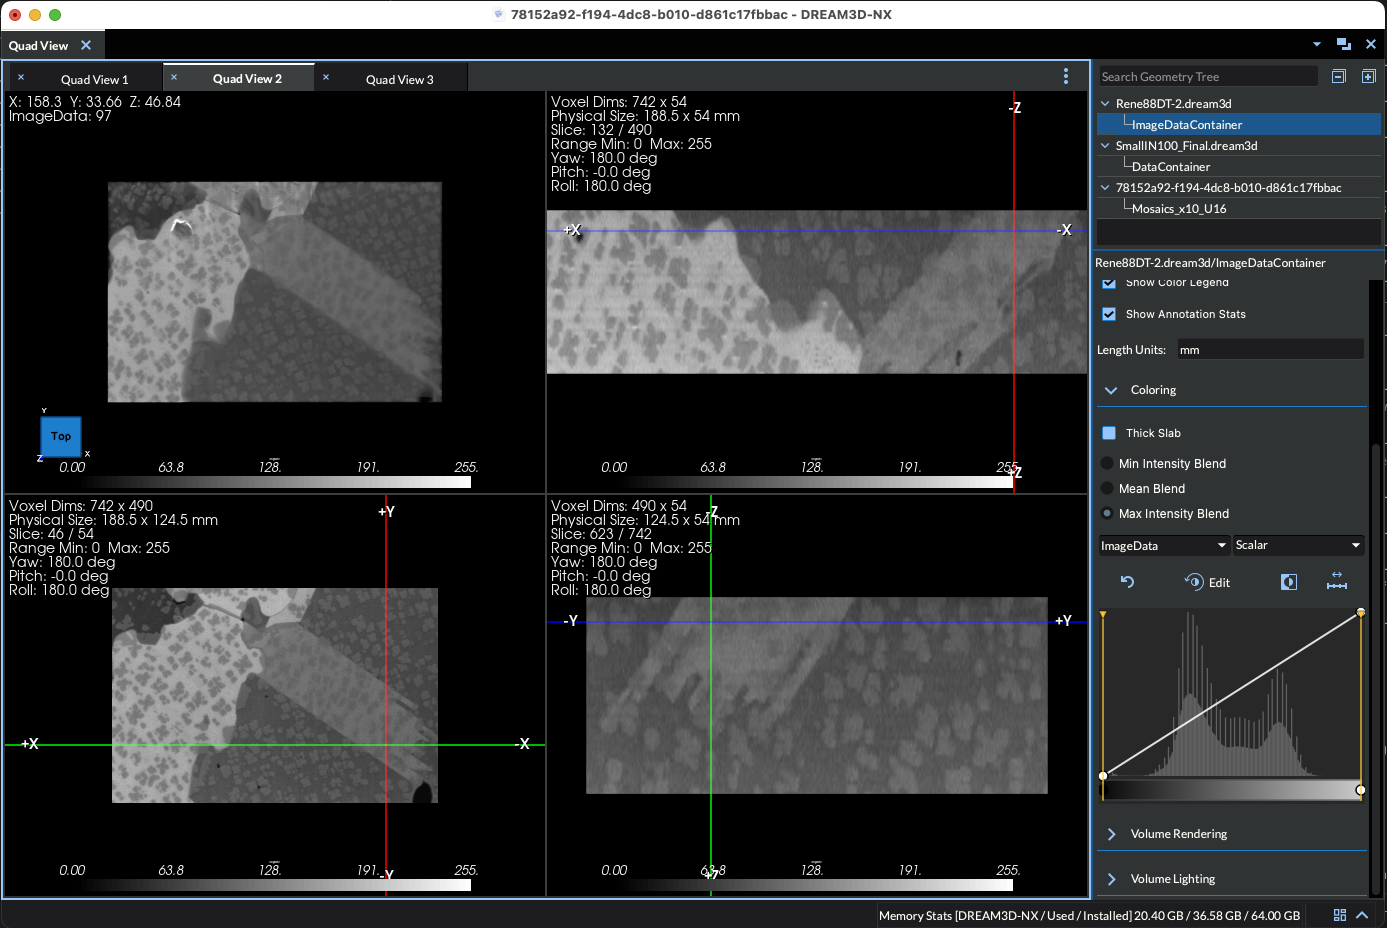
Figure 7.14 A Quad View pane holding three tabs, each displaying a different
geometry. Click a tab in the strip to switch between them; use the
× close button on a tab to remove it.
Removing a Data Source from the Browser
To remove a data source (and all of its geometries) from the Geometry Browser, right-click the top-level entry and select Delete Item and Children from the context menu. If the removed data source was the currently active geometry in the view, all four windows will clear and return to a blank state.
Individual geometry children can also be selected and deleted in the same way. Deleting the currently active geometry will clear the views.