7.6. View Annotations
In this section we describe the annotation features available in the Quad View module: the per-window text statistics overlay, the color legend, and the interactive ruler and mark placement annotations.
The Quad View module can display color legends and a real-time text statistics overlay directly on top of each of the four windows. Windows 2–4 show a detailed slice statistics overlay, while Window 1 shows the current crosshair position and data value at that position. This overlay is useful for quickly reading the current slice position, data range, and orientation angles without needing to examine the controls panel separately.
In addition to the overlay, users can place rulers (two-endpoint distance measurements) and marks (single-point sticky notes) directly onto the three slice panes. Placed rulers and marks are aggregated into a table in the Controls Panel that lets you rename, lock, navigate to, and delete annotations from any pane.
All annotation-related options — the overlay toggles, color legend, length units, and the rulers / marks table — are grouped into a collapsible Annotations section in the Controls Panel on the right side of the module:
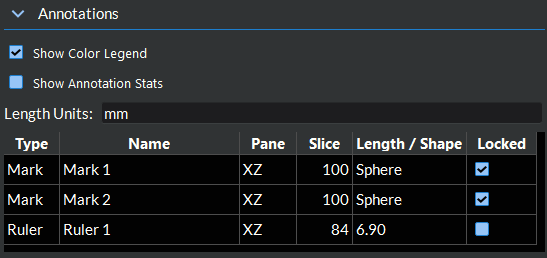
Figure 7.28 The Annotations section of the Controls Panel, showing the Show Color Legend and Show Annotation Stats toggles, the Length Units field, and the aggregated rulers / marks table.
Enabling Color Legend
The Show Color Legend checkbox toggles the display of a horizontal color scale bar at the bottom of all four windows. The color bar shows the active color preset across the current data range and updates automatically whenever the array, component, color preset, or data range changes.
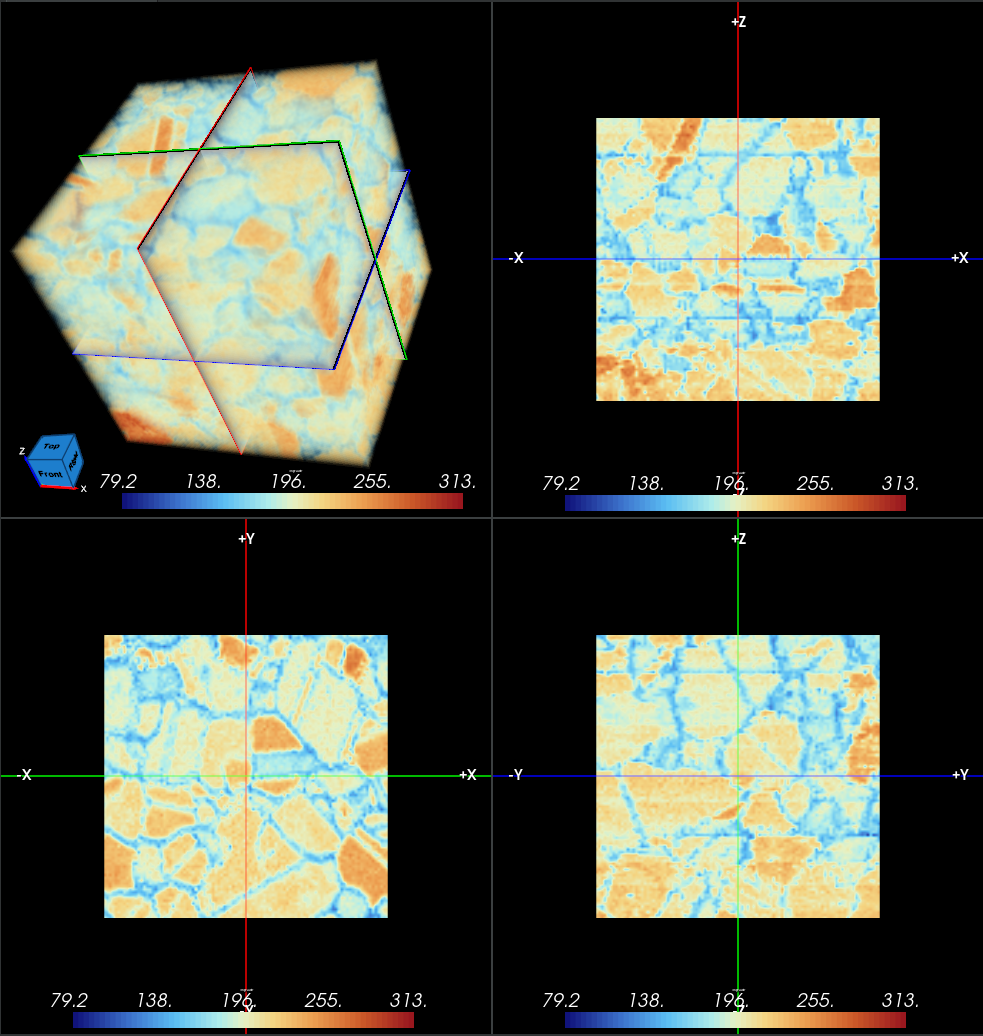
Figure 7.29 All Four Windows With the Color Legend Enabled
Enabling Stats Annotations
To toggle the annotation overlay, check or uncheck the Show Annotation Stats checkbox in the Controls Panel on the right side of the Quad View module. This checkbox controls annotations in all four windows simultaneously.
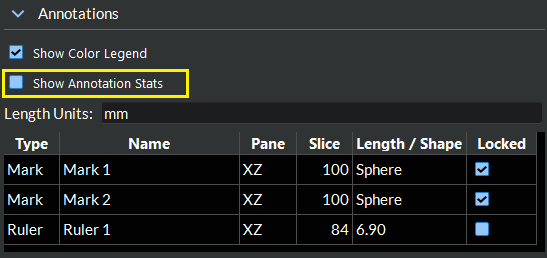
Figure 7.30 Stats Annotations Checkbox in the Controls Panel
Windows 2–4 Stats Annotation Content
When enabled, each of Windows 2–4 shows a multi-line text overlay in the upper portion of the window. The overlay displays the following information for that window’s slice plane:
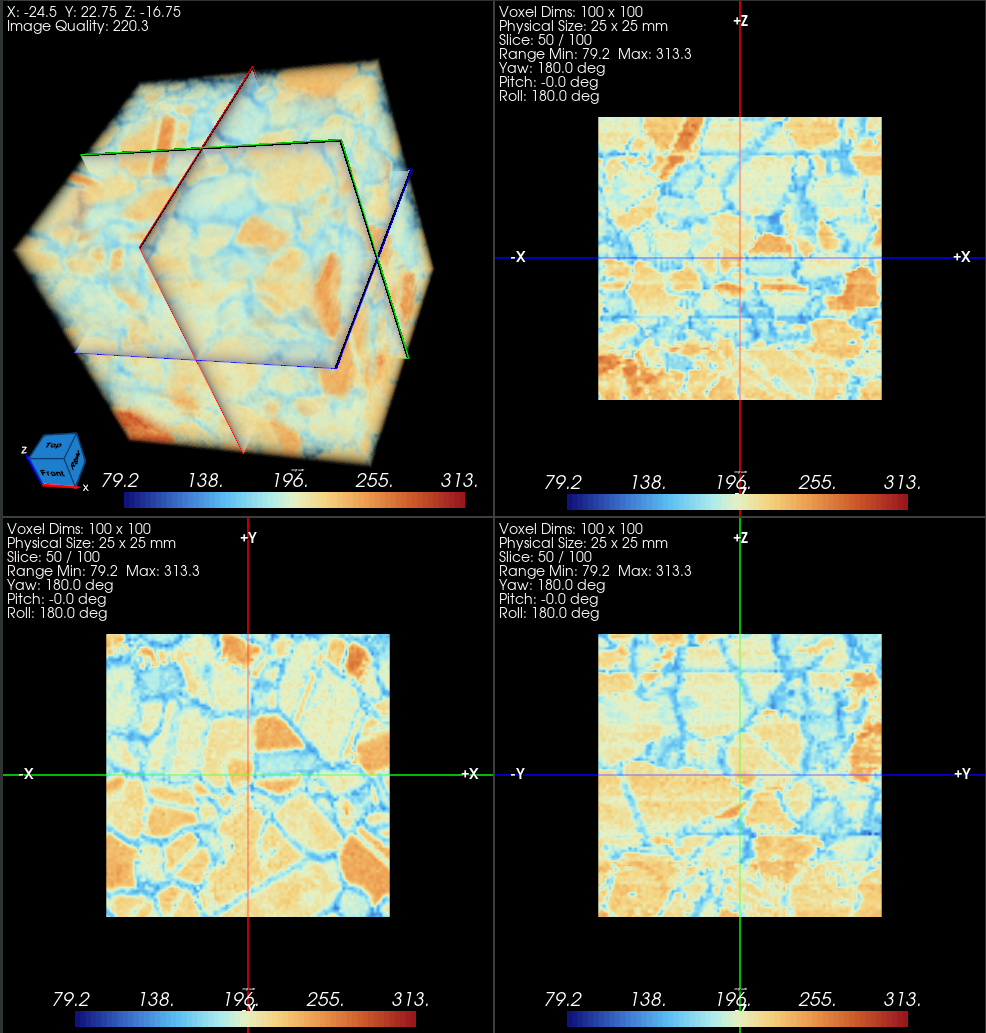
Figure 7.31 Text Annotation Overlay Visible in Windows 2–4
Dimensions: The pixel dimensions of the dataset along the two axes visible in the current window (for example,
512 x 256for the XZ plane).Physical Size: The physical extent of the dataset along the two in-plane axes, computed as the number of voxels multiplied by the voxel spacing. The unit label is set by the Length Units field in the Controls Panel (for example,
2048.0 x 1024.0 um).Range Min / Range Max: The minimum and maximum data values of the currently selected array across the full dataset. This reflects the currently configured data range, not the range of the visible slice.
Slice: The current slice index along the axis perpendicular to the current window, shown as
current / total(for example,60 / 117).Yaw / Pitch / Roll: The rotation angles of the slice planes in degrees. In axis-aligned mode these are always
0.0 deg. In oblique mode these update as the planes are rotated. See Oblique Reslicing for details.
Window 1 Stats Annotation Content
When annotations are enabled, Window 1 (the 3D volume rendering window) shows a small text overlay in the upper corner of the window. This overlay displays the current crosshair position and the data value sampled from the active array at that position:
Position: The X, Y, and Z world-space coordinates of the reslice cursor crosshair center (for example,
Pos: (128.0, 64.0, 96.0)).Value: The data value of the selected array at the crosshair position. For scalar arrays this is a single number; for multi-component arrays the active component value is shown; for vectors the magnitude is shown.
Rulers and Marks
Rulers and marks are interactive annotations placed directly onto the three slice panes (XY, XZ, YZ). The 3D pane (Window 1) does not host rulers or marks. Each annotation belongs to one specific slice pane and respects that pane’s slice context.
The two types serve different workflows and so have different defaults:
Rulers are two-endpoint distance measurements. They display the world-space distance between the two endpoints and are restricted to axis-aligned slices (XY, XZ, YZ — but not oblique reslicing). New rulers default to unlocked, so a placed ruler continues to follow the current slice as you scroll — the right behavior for a measurement workflow.
Marks are single-anchor sticky notes. They have a configurable color, shape (Sphere, Cross, or Square), pixel size, and an optional text label that displays the mark’s name next to its anchor in the viewport. Marks work in both axis-aligned and oblique slice modes. New marks default to locked, so a placed mark stays pinned to the specific slice it was placed on — the right behavior for a sticky-note workflow.
Placing a Ruler
Right-click on the background of any slice pane and choose Add Ruler Here. A new ruler appears with one endpoint at the click position and the second endpoint offset along the pane’s in-plane horizontal axis.
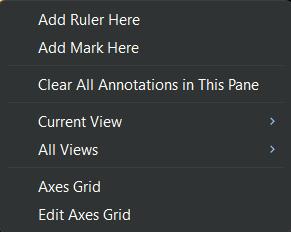
Figure 7.32 Right-click context menu on a slice pane showing the Add Ruler Here and Add Mark Here items.
After placement, click and drag either endpoint to reposition it. The ruler’s length updates live as you drag. The endpoint coordinates are constrained to lie on the slice plane.
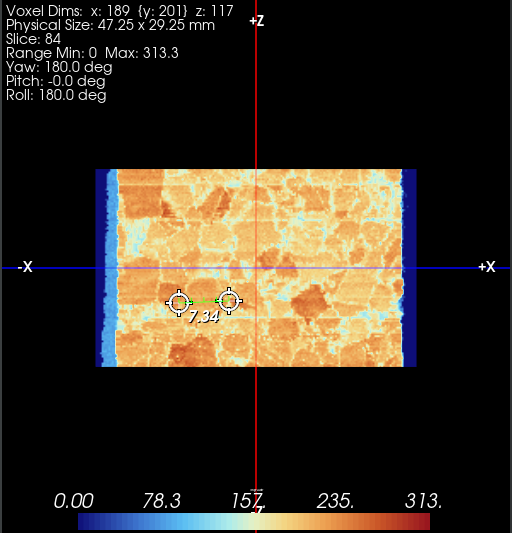
Figure 7.33 A ruler placed on an axis-aligned slice. Both endpoints and the distance label are visible.
Note: when the slice pane is in oblique reslicing mode, the Add Ruler Here menu item is hidden. Ruler measurements on an obliquely-tilted slice would be ambiguous to interpret. See Oblique Reslicing for context.
Placing a Mark
Two equivalent placement methods are available:
Right-click → Add Mark Here. The primary discoverable path. Identical to the ruler placement except the new annotation is a single-anchor mark.
M + left-click. The power-user shortcut. Hold the M key and left-click anywhere on the slice pane to drop a mark at the cursor. This works without the pane needing focus first — moving the cursor over a pane and pressing M arms the gesture, then a click anywhere on that pane completes it. Typing the letter “m” into the HUD’s name field or any other text input does not arm the gesture.
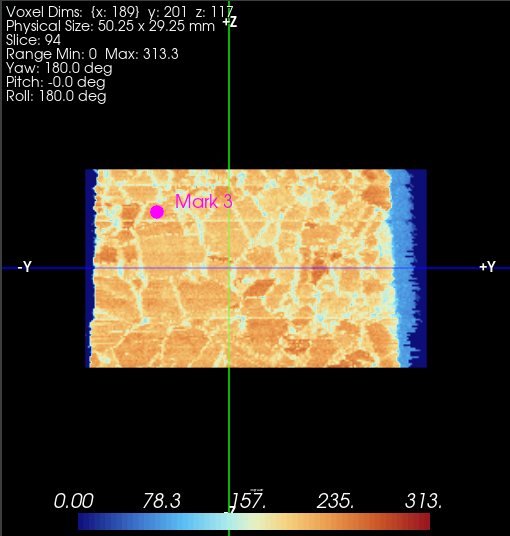
Figure 7.34 A mark placed on a slice with its in-viewport text label visible.
Lock vs Unlock
Every ruler and mark is either locked or unlocked:
A locked annotation is pinned to its anchor slice. It is shown only when the pane’s current slice matches the anchor slice and hidden whenever you scroll away. Scrolling back to the anchor slice reveals it again.
An unlocked annotation follows the pane’s current slice as you scroll. The annotation’s in-plane (U / V or X / Y) position is preserved across the scroll; only its cross-plane coordinate updates to match the new slice’s depth.
When you toggle an annotation from unlocked to locked, its anchor is re-captured at the current slice — not at the slice where it was originally placed. This is the lock-here semantic: locking pins the annotation at where it currently is, which is what users expect when they say “lock this here, it’s at the right slice now”.
Editing an Annotation (the HUD)
Open the HUD (heads-up display) editor for an annotation by double-clicking it on the slice pane, or by right-clicking it and choosing Edit Ruler / Edit Mark.
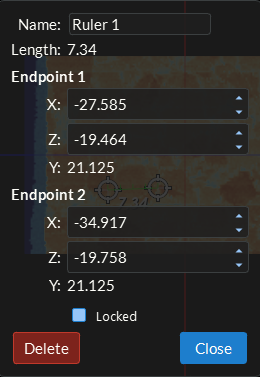
Figure 7.35 The Ruler HUD editor showing editable name, endpoint coordinates, length readout, lock toggle, and Delete / Close buttons.
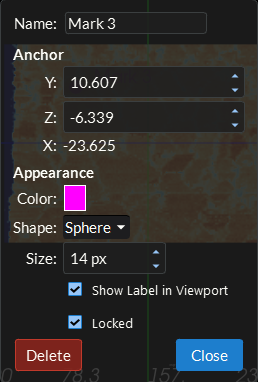
Figure 7.36 The Mark HUD editor showing editable name, anchor coordinates, color, shape, size, label toggle, and lock toggle.
The HUD floats over the slice pane and is draggable — click on its background and drag to reposition. Once you’ve moved the HUD it stays where you put it; it does not snap back to the annotation when you scroll slices.
Edits in the HUD apply live: changing the name, color, shape, or endpoint coordinates updates the viewport immediately. There is no “Apply” button — edits are committed when you press Tab, Enter, or click outside the field.
The bottom row has two buttons:
Delete (left, red). Opens a confirmation dialog (“Delete name?”) with Cancel as the default button. Confirming removes the annotation from the pane and the aggregated table.
Close (right, blue). Dismisses the HUD. Pressing Esc or clicking outside the HUD also dismisses it. Closing the HUD does not discard any edits — edits applied live.
Coordinate axis labels in the HUD adapt to the slice orientation. For axis-aligned slices the labels are the world axis names (X / Y / Z). For oblique slices the labels fall back to plane-relative coordinates (U / V / Normal), since no single world axis corresponds to the tilted plane’s in-plane directions.
Annotations Table
The aggregated annotations table in the Controls Panel collects rulers and marks from all three slice panes into a single sortable view.
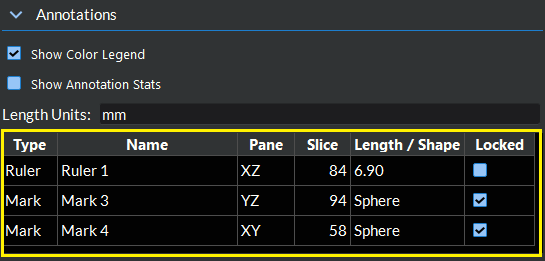
Figure 7.37 The aggregated rulers / marks table showing annotations from all three slice panes with type, name, pane, slice, length / shape, and lock state columns.
Columns:
Type:
RulerorMark.Name: Inline-editable. Double-click the cell to rename. The auto-generated default names are
Ruler NandMark N(numbered uniquely across all panes).Pane:
YZ,XZ, orXY— which slice pane the annotation lives in.Slice: Display slice index. For locked rows this is the anchor slice. For unlocked rows this updates live as you scroll the pane to show where the annotation can currently be found.
Length / Shape: Length in world units for rulers, shape name (
Sphere/Cross/Square) for marks.Locked: Checkbox. Toggling it sets the annotation’s lock state with the lock-here semantic described above.
Table actions:
Double-click a row: Snaps the row’s pane to the annotation’s anchor slice and focuses that pane (so the next scroll-wheel turn lands in it).
Right-click a row: Opens a context menu with Show in Pane (same behaviour as double-click), Delete (with confirmation), and Clear All Annotations (All Panes) (also with confirmation).
Select rows and press Delete: Removes every selected annotation in a single batched operation. A single confirmation dialog asks “Delete N annotations?” before any are removed.
Selecting rows: Highlights the corresponding annotations in the viewport with a 1.5× size bump, so the table-to-viewport correspondence is visible at a glance.
Clearing Annotations
Two ways to remove multiple annotations at once:
Pane right-click → Clear All Annotations in This Pane. Removes every ruler and mark from the right-clicked pane only. Annotations in the other two slice panes are untouched. The menu item shows a tooltip describing this scope so the user is not surprised.
Table right-click → Clear All Annotations (All Panes). Removes every annotation from every slice pane.
Both actions show a confirmation dialog with Cancel as the default button, so a stray Enter keypress does not vaporize the user’s work.
Loading a New Geometry
When a new geometry is loaded into the Quad View, all existing annotations are cleared from every pane. Annotations are not migrated across geometries — an annotation’s world-space coordinates only make sense in the context of the geometry it was placed on. This includes the case where a state file references a geometry that is then re-imported with different bounds.
Live Updates
The stats annotation text updates automatically as you interact with the views. While dragging a slice plane or rotating in oblique mode, the annotations update at approximately 30 frames per second. When the interaction ends, the annotations are refreshed one final time to display the exact final values.
Ruler and mark visuals also update live during interaction. A ruler’s length label refreshes as you drag either endpoint. An unlocked annotation re-projects onto the current slice as you scroll, so its in-plane (U / V or X / Y) position is preserved while its cross-plane coordinate follows the slice depth. Mark size and label position are pixel-stable through zoom and pan — zooming in does not visually enlarge a mark’s glyph.
State Persistence
Color legend visibility, stats annotation visibility, and the length-units text are all stored per Quad View tab. Switching between tabs restores each tab’s annotation settings independently, and all three values are written into the saved state file when the layout is saved. See Saving and Loading State for details.
Rulers and marks are also persisted to the saved state file. For each annotation the saved record captures the type, name, lock state, anchor slice, anchor plane orientation, geometry bounds, endpoint coordinates (rulers) or anchor coordinate (marks), and appearance settings (color, shape, size, label visibility for marks). On state load each annotation is reconstructed in its original pane.
A few caveats apply to ruler and mark persistence:
Geometry path: the saved state references the geometry path the annotations were placed against. If that geometry can no longer be resolved at load time (for example, the source data has been moved or removed), the Quad View view itself does not load and the annotations for that tab are not restored.
Loading a different geometry: as noted above, loading new geometry into a Quad View tab clears that tab’s annotations. This applies whether the load is initiated by drag-and-drop or by the state-file load path.
Forward compatibility: if a state file written by a newer build of the application contains annotation types this build does not know about, those records are skipped on load with a status message in the application output. Known types (rulers and marks) continue to round-trip cleanly.