4.2. Importing Data to be Visualized
There are three basic ways to import data into the DREAM3D-NX-NX visualizer:
loading directly from a file
loading from a DREAM3D state file
running a DREAM3D-NX-NX pipeline containing geometry data
The following sections will go through how to import data using each of these methods in detail.
Importing Data From a Pipeline
The main way of importing data to be visualized in DREAM3D-NX-NX is by running a pipeline containing geometry data. Any data arrays contained inside imported geometries can be used to color the geometry data sets based on the values within the data arrays.
Load or create your pipeline. See the Creating a Pipeline section in User Interface Overview for more detailed instructions.
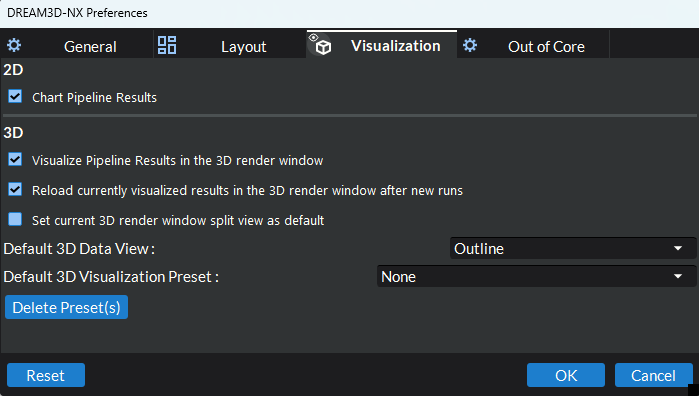
Click on the Visualization Preferences eyeball icon at the bottom of the Pipeline View and make sure Visualize Pipeline Results is checked.
Pressing “Visualization Preferences” Eyeball
Viewing “Visualization Preferences” Settings

Click the Run button at the bottom of the Pipeline view to run the pipeline.
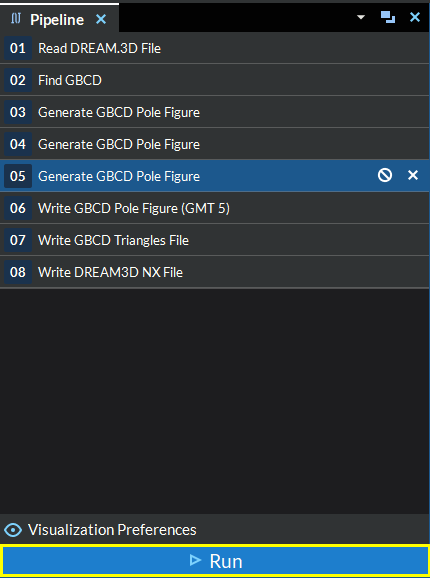
Figure 4.2 Run Pipeline
Select the Visualization tab if tab is not already active.
In the center of the DREAM3D-NX window containing the pipeline you just ran, make sure the Visualization tab is active.

Figure 4.3 Visualization Tab
Once your pipeline has completed, you will find the pipeline run with all of its associated geometries in the Visualization Browser section of the Render Properties tab. Each pipeline run will be listed as a heading in the Visualization Pipeline Browser tree along with all of its geometries underneath. Data Views and Filters are then listed under each geometry. If a pipeline that has already been loaded into the Visualization Pipeline Browser tree is executed again, then the pipeline and all its children in the Visualization Pipeline Browser tree will be reloaded.
Importing Data Directly From a File
The second method of importing data to be visualized in DREAM3D-NX is by loading the 3D geometric data directly from a file. There are several file types supported by DREAM3D-NX for importing into visualization; these include the following:
.bmp
.dream3d
.jpg
.png
.stl
.tif
.vti
.vtp
.vtr
.vts
.vtu
Make sure the Render Properties view is active. This will be docked along the right side of the DREAM3D-NX window by default along with the Data Structure tab.
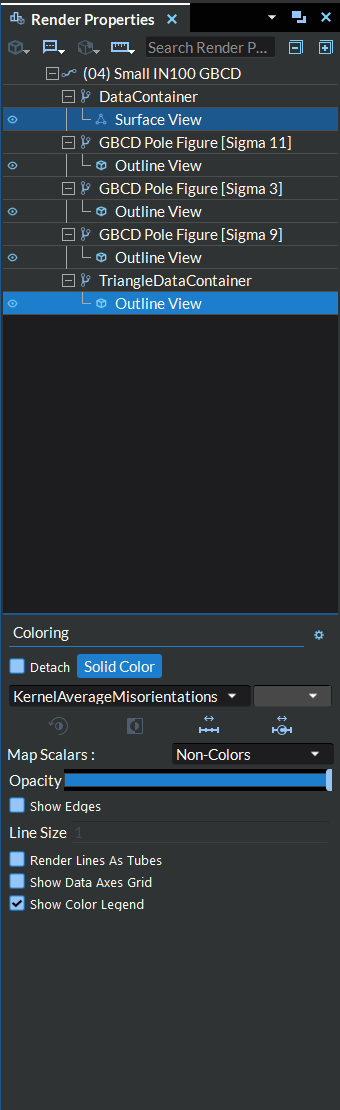
Figure 4.4 Render Properties View
Right-click an item in the Visualization Pipeline Browser section of the Render Properties view and select the Load File option from the context menu that appears
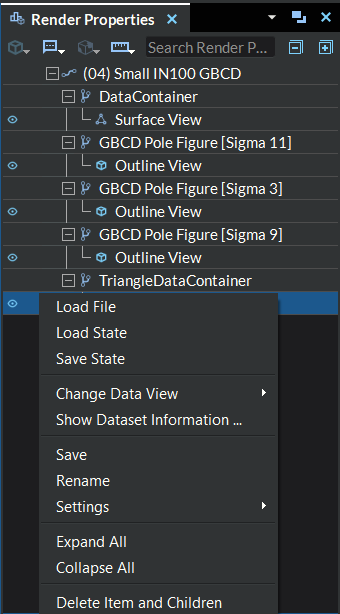
Figure 4.5 Load via File
In the file browser that appears, navigate to the file you wish to import and select Open. 3D geometric data found in the file will be loaded into the Visualization Pipeline Browser tree, and any color by data arrays contained in the file will automatically be applied to the geometry when it renders.
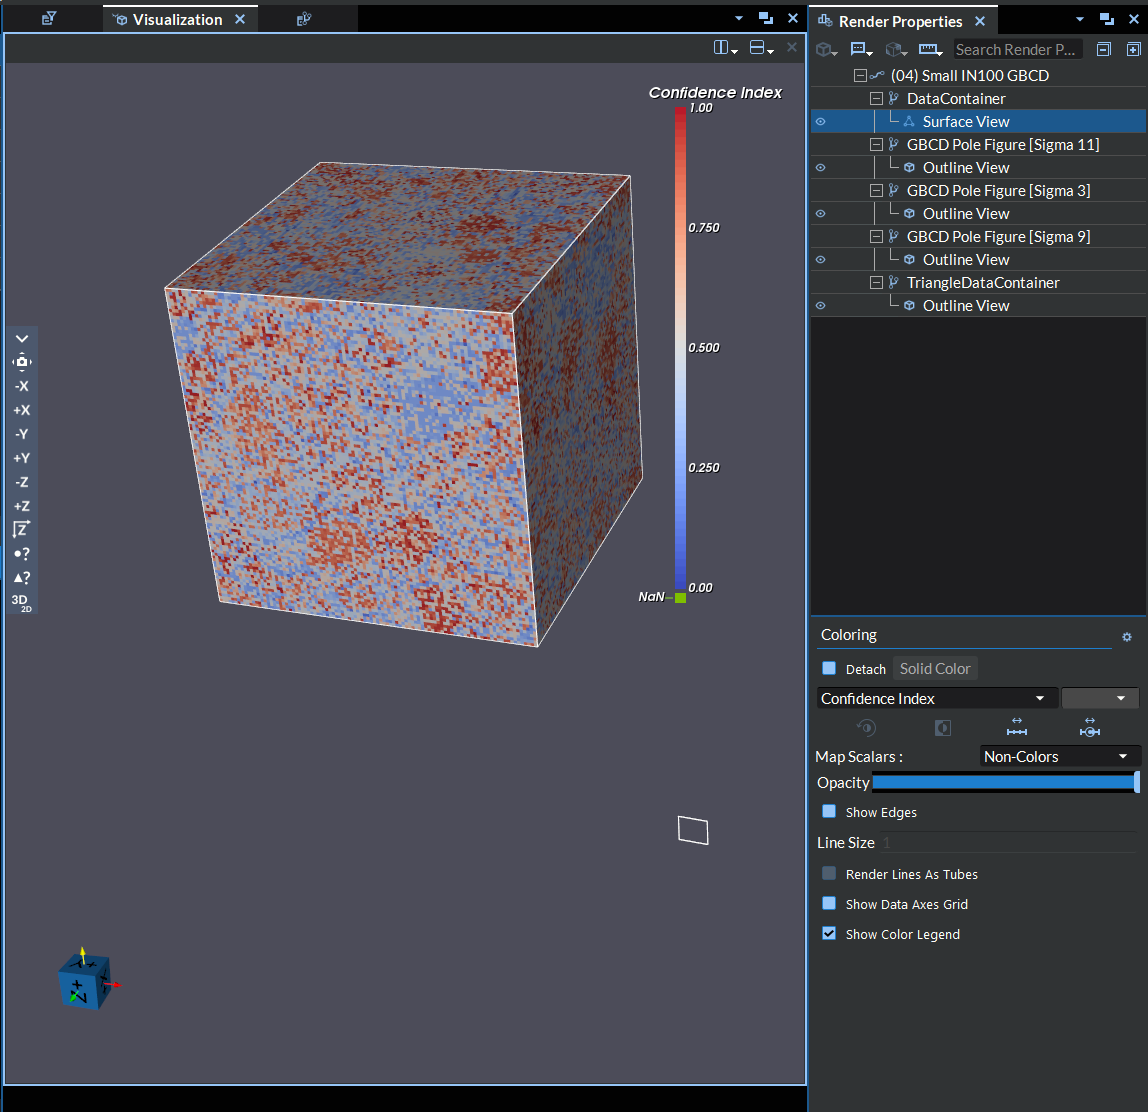
Figure 4.6 Load via .dream3d File
Importing Data From a DREAM3D State File
The third method of importing data to be visualized in DREAM3D-NX is by loading a DREAM3D state file (.d3dstate). This will load all of the geometry data as well as the entire visualization state from a previously saved session. (See Saving and Loading State Files for more details on DREAM3D-NX state files)
It is important to note that when loading a state file, the current split views/render window settings will be cleared and any geometry data currently loaded into the visualization might be deleted.
Make sure the Render Properties view is active. This will be docked along the right side of the DREAM3D-NX window by default along with the Data Structure tab.
Right-click an item in the Visualization Pipeline Browser section of the Render Properties view and select the Load State option from the context menu that appears
In the file browser that appears, navigate to the state file you wish to load and select Open. 3D geometric data found in any of the source files will be loaded into the Visualization Pipeline Browser tree, any color by data arrays contained in the source files will automatically be applied to the geometry when it renders, and all representation, filter, and render window settings will be restored.