3.17. Application Preferences
This section will list out all of the application wide configuration options available. These preferences are organized into general application preferences, layout preferences, results preferences, visualization preferences, and python preferences (if applicable). These options are all available in the DREAM3D-NX preferences dialog which can be found by going to the Tools menu and clicking on Preferences.
General
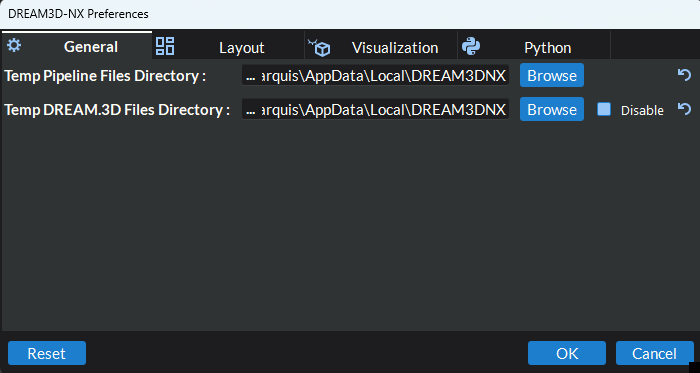
Figure 3.32 General Preferences
Temp Pipeline Files Directory - The directory in which temporary pipeline files containing the latest changes to any opened pipelines will be saved to avoid loosing data in the event of an unexpected application closure.
Temp DREAM3D-NX Files Directory - The directory in which temporary DREAM3D files with the latest data struture changes from any opened pipelines will be saved to avoid loosing data in the event of an unexpected application closure. This feature will automatically detect if the final data structure for your pipeline was written using a Write DREAM3D NX File filter. If not, a temporary .dream3d file with the corresponding xdmf file will be written to the selected directory upon finishing the pipeline or when the pipeline stops unexpectedly. Please note that this temporary file will not be written when cancelling the pipeline.
Reset - Resets all of the application preferences back to the application defaults.
Layouts
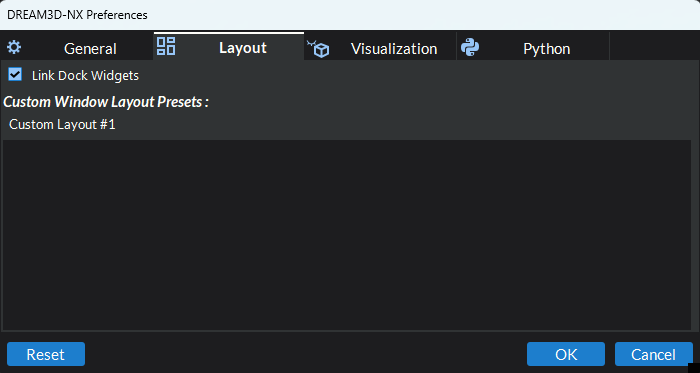
Figure 3.33 Layouts Preferences
Link Dock Widgets - When checked, this will link together the filter parameters and data structure docks (in pipeline building mode), workflow parameters and data structure docks (in workflow mode), and the visualization and render properties docks such that when one dock is made visible, the linked one will also become visible
Custom Window Layout Presets - This is the list of all the currently saved custom user window layouts. You can delete a layout preset by clicking the delete button (
 ) that appears when you hover or click on the item in the list.
Results
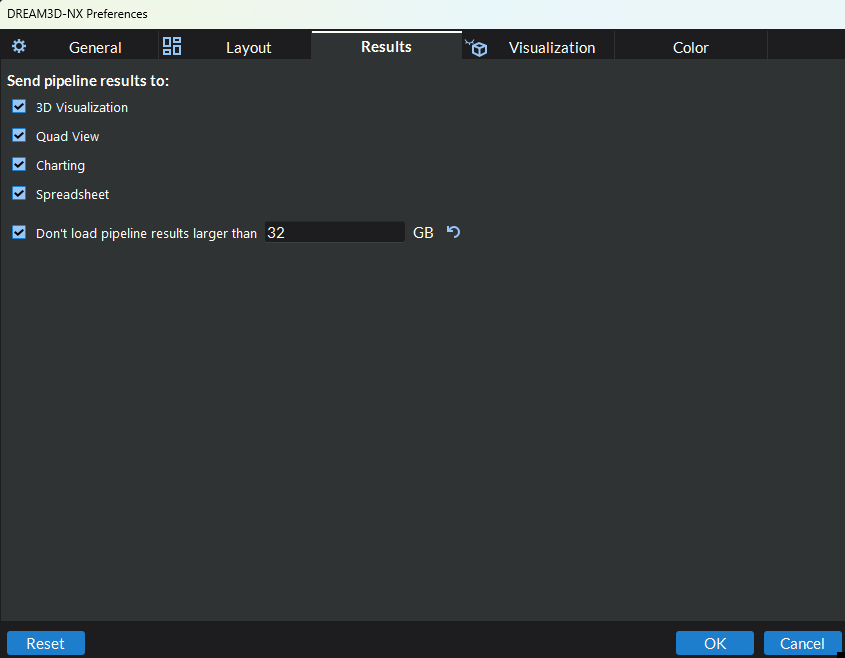
Figure 3.34 Results Preferences
This tab controls which display modules receive a pipeline’s results after it finishes running, plus an optional limit that skips loading results that are too large to hold in memory.
Send pipeline results to:
3D Visualization - Whether to load the results of a pipeline into the 3D Visualization render window after running.
Quad View - Whether to load the results of a pipeline into the Quad View module after running.
Charting - Whether to load the results of a pipeline into the Charting module after running.
Spreadsheet - Whether to load the results of a pipeline into the Spreadsheet module after running.
Don’t load pipeline results larger than [N] GB - When enabled, this safeguard prevents a pipeline’s final data structure from being loaded into the display modules above when it exceeds the specified size (default: 32 GB). If the limit is exceeded, a single warning dialog appears naming the modules that were skipped:
3D Visualization and Quad View always hold their data in memory, so they are skipped whenever the limit is exceeded.
Charting and Spreadsheet can read individual arrays on demand from a
.dream3dfile, so they are skipped only when no file is available to read from — that is, when the Temp DREAM3D-NX Files Directory option (General tab) is disabled and there is no Write DREAM3D NX File filter in the pipeline. When a file is available, they load normally regardless of the limit.
When no permanent
.dream3dfile exists, the warning dialog offers to save the data structure to a file so the results are not lost. The reset button next to the value restores the default limit.Confirm before clearing spreadsheet/chart data - When checked, a confirmation dialog is shown before the Clear Data Structure action removes the imported data from the Spreadsheet or Charting module (see Clearing the Data Structure). The dialog includes a Don’t ask me again option which, when used to clear, unchecks this preference. This option is only shown when the charting or spreadsheet module is available.
Visualization
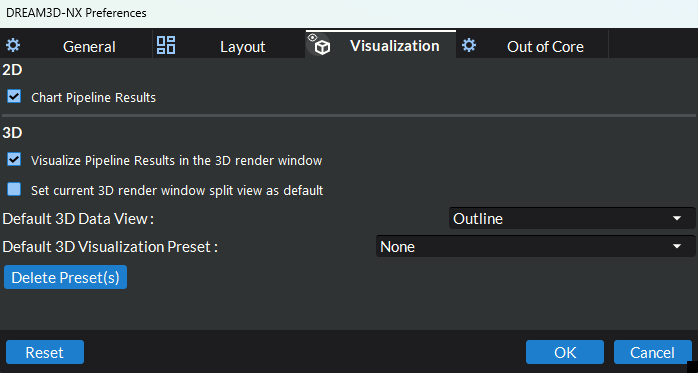
Figure 3.35 Visualization Preferences
Set current 3D render window split view as default - Sets the render window(s) split view state of the currently active pipeline window as the default when opening new pipeline windows.
Set camera parallel projection as the default - If checked, the default camera projection will be set to parallel.
Per-Geometry Default 3D Data View - Configures the default data view that will be added to a data source for each geometry type when first being loaded into visualization. Each geometry type (Image, Rectilinear Grid, Vertex, Edge, Triangle, Quad) can have its own default. See Per-Geometry Default Data View for details. Take extra care when setting these values to anything other than Outline as this can increase load times and be resource intensive depending on the size of your data set.
Default 3D Visualization Preset - The default visualization preset that will be applied to a data source when first being loaded into visualization. This will override the default data view option above when set.
Delete Preset(s) - Allows the user to delete any of the application’s saved visualization presets.
Disable automatic decimation when interacting with data views - When checked, this disables automatic geometry simplification (decimation) during interactive operations such as rotating, panning, or zooming in the 3D render window. By default (unchecked), the system automatically reduces geometric complexity during interactions to maintain smooth frame rates. Enabling this option keeps full-resolution data displayed at all times for higher visual fidelity, but may reduce interactivity performance with large datasets.
Orientation Marker Preferences - Configures the labels displayed on the orientation marker cube shown in the corner of 3D render windows. Three presets are available:
Default — Right, Left, Back, Front, Top, Bottom
XYZ — X+, X-, Y+, Y-, Z+, Z- (mathematical axis notation)
Custom — Allows you to enter your own labels for each of the six faces (e.g., anatomical orientation labels)
This preference also drives the orientation marker (view cube) shown in Window 1 of the Quad View module. Changing the preset updates every open Quad View pane immediately.
Color
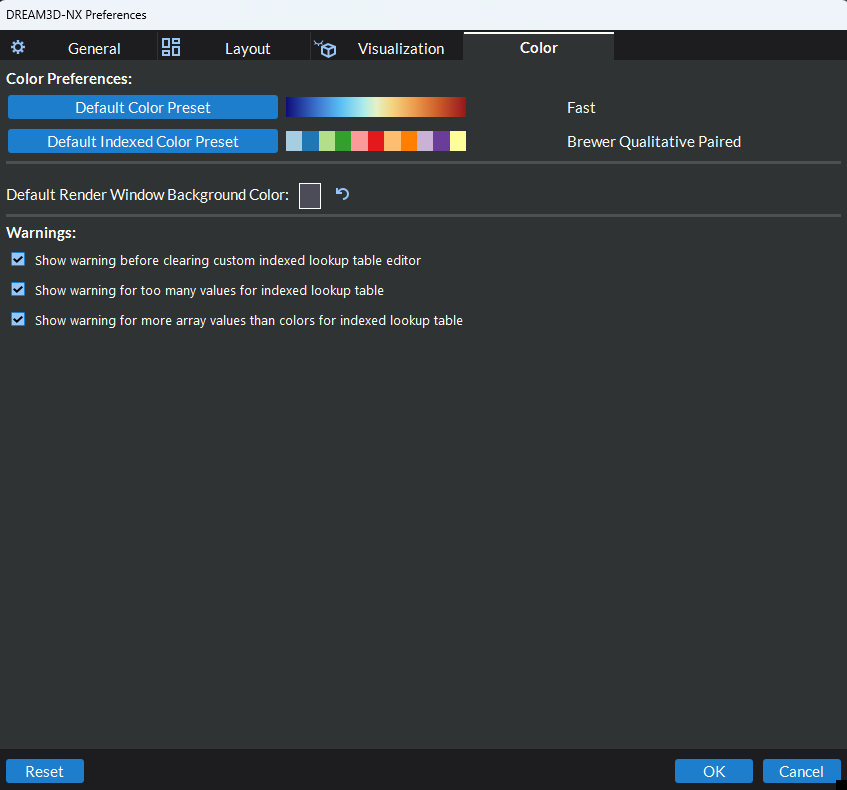
Figure 3.36 Visualization Color Preferences
Default Color Preset - The default color preset that will be used for mapping 3D data to colors for viewing in the render window.
Default Indexed Color Preset - The default color preset that will be used for mapping 3D data to colors for viewing in the render window when in indexed lookup (categorical colors) mode.
Default Render Window Background Color - The default background color that will be used in the render window(s)
Show warning before clearing custom indexed lookup table editor - If checked, a warning will be shown before clearing the custom indexed lookup table editor when editing an existing preset or restoring the default indexed preset.
Show warning for too many values for indexed lookup table - If checked, a warning will be shown when attempting to interpret values as categories for data arrays with more than 32 unique values.
Show warning for more array values than colors for indexed lookup table - If checked, a warning will be shown when the active data array has more unique values than there are colors in the selected indexed preset. In this case, there may be some colors mapped to more than one value.
Python
Note: Depending on how you obtained your version of DREAM3D-NX you may or may not have this section.
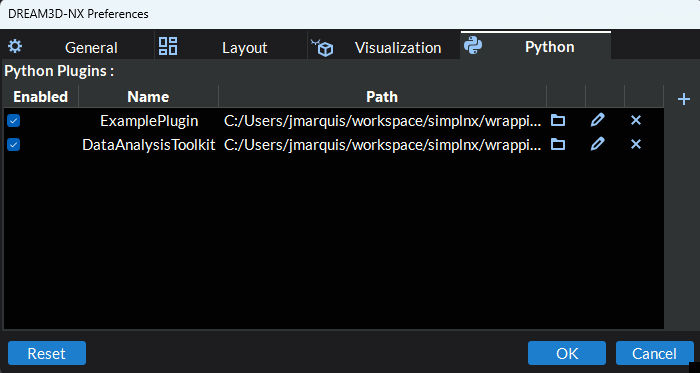
Figure 3.37 Python Preferences
Add Python Plugin Directory (
 ) - Add the directory containing a python plugin to be included in the application. You can also add plugins by
dragging and dropping the plugin directory directly into the table area to the left of the add button.
) - Add the directory containing a python plugin to be included in the application. You can also add plugins by
dragging and dropping the plugin directory directly into the table area to the left of the add button.Edit Python Plugin Directory (
 ) - Edit an existing python plugin directory. You can access this option by either clicking the edit button to the right
of the plugin directory you wish to edit or by double clicking on the text item you wish to edit.
) - Edit an existing python plugin directory. You can access this option by either clicking the edit button to the right
of the plugin directory you wish to edit or by double clicking on the text item you wish to edit.Delete Python Plugin Directory (
) - Delete an existing python plugin directory to remove the plugin from the application.Show Python Plugin in File Browser (
 ) - Show the python plugin in a native file browser.
Enabled - This option can be checked or unchecked to enable or disable the corresponding plugin within the application. This can be useful to temporarily remove the plugin from the application without actually deleting it.